

After one of our Facebook friends, Tiffany Kluempers, posted the result of her chick-ified (that’s a technical term) firearm, I was inspired. I contacted her and she insisted that the process was easy and that using non-acetone nail polish remover would not damage the finish on metal or polymer. I then asked you, my beloved readers, to chime in on which color of nail polish I should use. Pink won out over baby blue, orange and lavender, not only in number but also in plucks of the heartstrings. Several people suggested I use pink in support of breast cancer survivors. Incidentally, you can also do that by purchasing a Julie Golob S&W M&P 9mm.
Supplies:
-
Firearm
-
Nail Polish color of your choice. Brights are fun. Dark colors can be a cool, subtle change.
-
Non-Acetone Nail Polish Remover (Note: MUST BE *NON*-Acetone in order to keep the original finish on the gun in tact)
-
Cotton Swabs
-
Cotton Balls
-
Paper or Cotton Towels


-
Remove your mag and clear your firearm. Lock the slide back and keep it in this position for the entire process. Feel free to insert your cable lock (not pictured) as added security. Especially if you’ve got little ones running around.
-
Clean the area of the gun you wish to chick-ify by wiping it down with the paper or cotton towel.
-
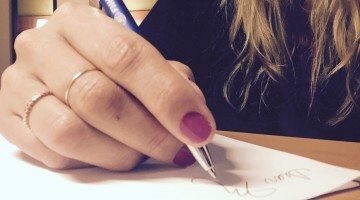
Take your nail polish and begin filling in your specified grooves/lettering/symbol with nail polish. Painting outside the lines in this situation is perfectly acceptable.
-
After 30 minutes, check to see if you feel that you need another coat. If so, go to town on that gun. I used three coats on my LCP to ensure the nail polish would be bright enough to see.
-
Repeat steps 1-4 with your magazines.
-
Let the nail polish dry overnight – it seems like forever, I know, but trust me on this one.
-
Wake up and be excited about finishing your project. You’re almost there!
-
Now that the polish is completely dry, use your NON-ACETONE (!!!) nail polish remover on a cotton ball to wipe away the excess nail polish. Use the cotton swabs to clean the more detailed areas of the lettering.
-
Voila! You’re finished!! Now take pictures and post them on our Facebook wall. Can’t wait to see!
Thanks again, Tiffany, for this super fun idea.